In this tutorial, you will learn how to make an X-Ray image—you know, like you see in airport scanners. You'll discover how these techniques could be applied to any mechanical object, or electronic device, like a digital camera. Additionally, you'll learn about a nondestructive Camera Raw workflow.
Final Image Preview
Before we get started, let's take a look at the image we'll be creating. Click the screenshot below to view the full-size image. As always, the full Photoshop file is available via our Psdtuts+ Plus membership.

Preparations
Hint: Although doing an X-Ray image is possible since Photoshop has layer blending options, the workflow shown here uses Raw files, and features available since CS2. But you can ignore them and just do the X-Ray with simple JPGs if you prefer.
To get this result, we needed lots of photos; I shot them myself. I picked up an old Nikon compact camera, which I can completely destroy without fear. Be forewarned: after doing this, it's likely that your device won't function any more!
Set up a small white studio wall and studio lights (for constant lightning). I disassembled the camera from outer to inner, and took the screw off every part. Then I shot the interior camera parts. I took a photo from every state and every single part. Be sure to shoot from behind as well (in an X-Ray, we can see through, of course). So I shot over 200 photos. To see a demonstration of this process view the video below.
View Making a X-Ray (preparations) in HD on Vimeo.
Step 1
We want to do this image in a complete, nondestructive workflow. This means that we will not lose any pixels, or information, during the Photoshop process. To achieve this, shoot in Camera Raw. You'll end up with a mass of huge Raw files. Then you can sort and pick in Adobe Bridge. You can do basic photo developments in Adobe Camera Raw (exposure, lights, white balance, and so on), which causes no effect on the pixels of the source image (Bridge and Camera Raw are part of Photoshop since CS).
Let's develop the photo generally in Camera Raw. Save these settings by clicking on Done, see image below. All the corrections are written in a .xmp-sidecar-file. The original Raw file will be left untouched (we are doing it the nondestructive way!). We will need these settings later.


Step 2
Now finally, we can go to Photoshop and make our X-Ray. Set up a Transparent RGB image with proper dimensions. We want to make it in full-size, so choose around the same dimensions as your camera produces: in this case 3500 x 2500 pixels.
Now, we make an important decision. Do we want to make a white or black X-Ray? In typical clinical X-Rays, the film is blue and will be developed white. In modern airport scanners, we see a much fancier colored X-Ray on white background. So I choose a white background.
We have another decision to make. How to handle multiple layers? Should the X-Ray start dark and get brighter, as more objects overlay, or vice versa? I tried to make it brighter the more objects that overlay, but it's difficult to be constant with this.
To get a subtile film effect, color the background with a light cyan (#e8f3f4).


Step 3
This step is for a nondestructive Workflow. If you use simple JPGs, continue to Step 5.
Now we are ready to import our first layer of plastic. We go from the very back to the very front. Import the back cover of your device, go to File>Place. When it's a Raw file, the converter dialog comes up showing us our previous corrections. We saved them in the .xmp-sidecar-file.
After importing, we'll find the image placed into our file as a Smart Object. You see a miniature icon in the layer. When you click on the miniature of a Smart Object layer, you will be sent back to the camera raw dialog where you can optimize the settings and go back to Photoshop. (Notice: since we imported the whole Raw file into our Photoshop document, the changed settings will not be written back into the xmp of our your original file.)
We need to cut out the plastic from the background. While working with Raw files, we don't want to destroy any pixels (nondestructive image editing), so we have to do it with Masks. To make this efficient, follow these steps: Group imported Smart Object, convert this group into a new Smart Object, and rename it properly.


Step 4
To cut out the Raw import, go into the newly created Smart Object by double-clicking on layer miniature. Now you will find the Group, named "Gruppe 1." Draw a selection with any proper tool.
Consider using the Quick Selection Tool, available since CS3, or draw paths, if that suits you. In this case, a quick selection works well. This is because layer masks on Smart Object layers are not connected with them. We have to work with a group. So apply this layer mask to the parent group. After that, we are finished inside this Smart Object and can save and close it Cmd/Ctrl+W.


Step 5
Back in our main Photoshop file, we can finally do the X-Ray layer tricks. Group the "Back" layer again. This puts all plastic layers into very handy groups.
Above the layer containing the cut plastic, create a new adjustment layer of Hue/Saturation. Close this dialog immediately. Hold down the Alt Key. Then move your mouse pointer between the layers. When the mouse pointer changes to overlapping circles, click! This will create a clipping mask. The adjustment layer will only be active where the underlying layer is visible. Now you can go into the dialog of Hue/Saturation and colorize the plastic.
Just figure out values and play. It's important to experiment! You will often come back to this dialog to change values when more of the plastic layers are in the file. And play with the Colorize option.
This is just a simulation. In real X-Ray scanners, the colors will be decided by the type of material (plastic, metal, organic, or other). We just colorize per plastic layer. Try changing the colors without the Colorize option or limit coloring to several areas with layer masks. But, as you can see, it works well in the result.


Step 6
Repeat the steps import, cut out, and colorize with the next few layers of photographed material. Try the main board or a display next after you've worked on the back body. Now we have some plastic objects in our Photoshop file. Each is in a group with a coloring adjustment layer as a clipping mask.


Step 7
Now the magic: find the right blending method for the Smart Object layer. Let's create the transparency in the image now. This is all about trial and error. You may have to go back and change the coloring as well to get the best results.
Transparency depends on what's below, so you have to experiment and change these modes often. Try to let as many details as possible show through. Mostly, I used Hard Light, Vivid Light, Linear Light, Lighten, and Screen. Sometimes, Multiply or even a normal blending works also. I used values between 60% and 100%. This gives you a basic understanding of the process, but to review the image fully you'll need to download the layered Plus PSD source file.


Step 8
Repeat these steps for all objects. Always try to get the image brighter when more objects overlay, as we decided in the beginning. Adjust modes and colors to simulate the X-Ray effect to its full potential. If you're fluent in Photoshop, this may be finished in less than eight hours. Click the image below to view our layers.

Step 9
As you might have noticed, we are using Smart Objects and Adjustment Layers. And that keeps our design nondestructive. We can always go back to the original data and change all values at any time.
Final Tips: Try increasing the contrast of a layer by adding curves. You can achieve a unique effect by working with an invert adjustment layer on the top. Limit coloring to several areas, or add two or three color adjustment layers. Put the logo and sharp body lines on the top to improve recognition of the device.
To illustrate the whole process to you, I made a video containing every step in Photoshop, view below.
View X-Ray Tutorial in HD on Vimeo.
Final Image
We are finished when all objects are in place, colored, and transparent.


Conclusion
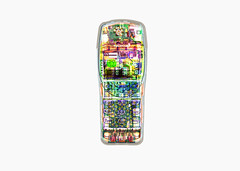
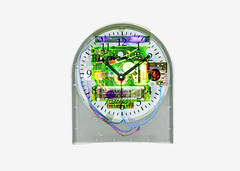
You can do this with multiple devices like a mobile phone, a clock, your computer, a television, or an iPhone. See other results on Flickr by clicking on an image below.